Project: Responding to User Input Part Two
In the previous section, we worked on the first part of the Multi-View Application project. For this final part of the project, we should continue working on the repository we cloned in the last section. We will work a bit more with forms and explore how to set up simple routes in our application to provide bookmarkable locations for our users.
It's assumed that we've already forked, cloned, and set up our workspace. We should be able to continue from where we left off last time.
Review the Requirements
In this second part of the project, we will set up another form and also some new routes in our application. The new routes will allow us to experiment with using vue-router to move the user to different locations within our site. The goal is to allow the user to click to the new member survey page, and then to move the user to the secret page once they have completed the survey successfully.
To do this, we will need to edit four files: Three components and the router definitions. There are TODO notes in each of the files to help us find what we need to edit, and we should be able to use the examples that came previously in this section to complete the work.
Here are the Basic Requirements outlined in the project README:
In the src/views/Survey.vue file
- Complete the survey form by filling in the TODO notes
- Use
v-forloops in the template to create options for the checkbox groups - Create a validation method to handle the rules outlined in the component comments
- Use a
$router.pushstatement to move the user to the Secret page
Create the src/views/Secret.vue file
- Create a basic component from scratch called
Secret - The content of the
Secretpage should be something you come up with: A favorite tip about web development, a funny joke, a humorous image, etc. - Provide links back to the other two pages using
<router-link>tags in the template
In the src/router.js file
- Import the Survey component properly
- Import the Secret component properly
- Add the Survey component at the
/surveypath - Add the Secret component at the
/secretpath
Please note: We will not be tackling these requirements exactly in order, but we will complete each of these.
Working the Project
As we begin work we will need to have the following files open:
src/views/Home.vuesrc/views/Survey.vuesrc/views/Secret.vuesrc/router.js
We will move between these files to complete all of the work for this project.
Adding the Survey View to the Routes Array
First of all, we should add the Survey view to the routes definition so we can preview our work as we complete the form and logic in that component. This is done by editing the src/router.js file. We find TODO notes in this file helping us know where we need to edit. First, we must import the Survey component, and then we must set up a route definition. Here is what that looks like:
import Vue from 'vue'
import Router from 'vue-router'
import Home from '@/views/Home'
import Survey from '@/views/Survey'
// TODO: Import the Secret component

Vue.use(Router)

export default new Router({
  routes: [
    {
      path: '/',
      name: 'home',
      component: Home
    },
    {
        path: '/survey',
        name: 'survey',
        component: Survey
    }
    // Add the Secret route definition
  ]
})
As we can see, there are still some TODO notes left in here, but we will handle those later. For now, we have added the import statement for the Survey component and the route definition. The route definition specifies the URL for the view, so we can load up that URL to preview our site:
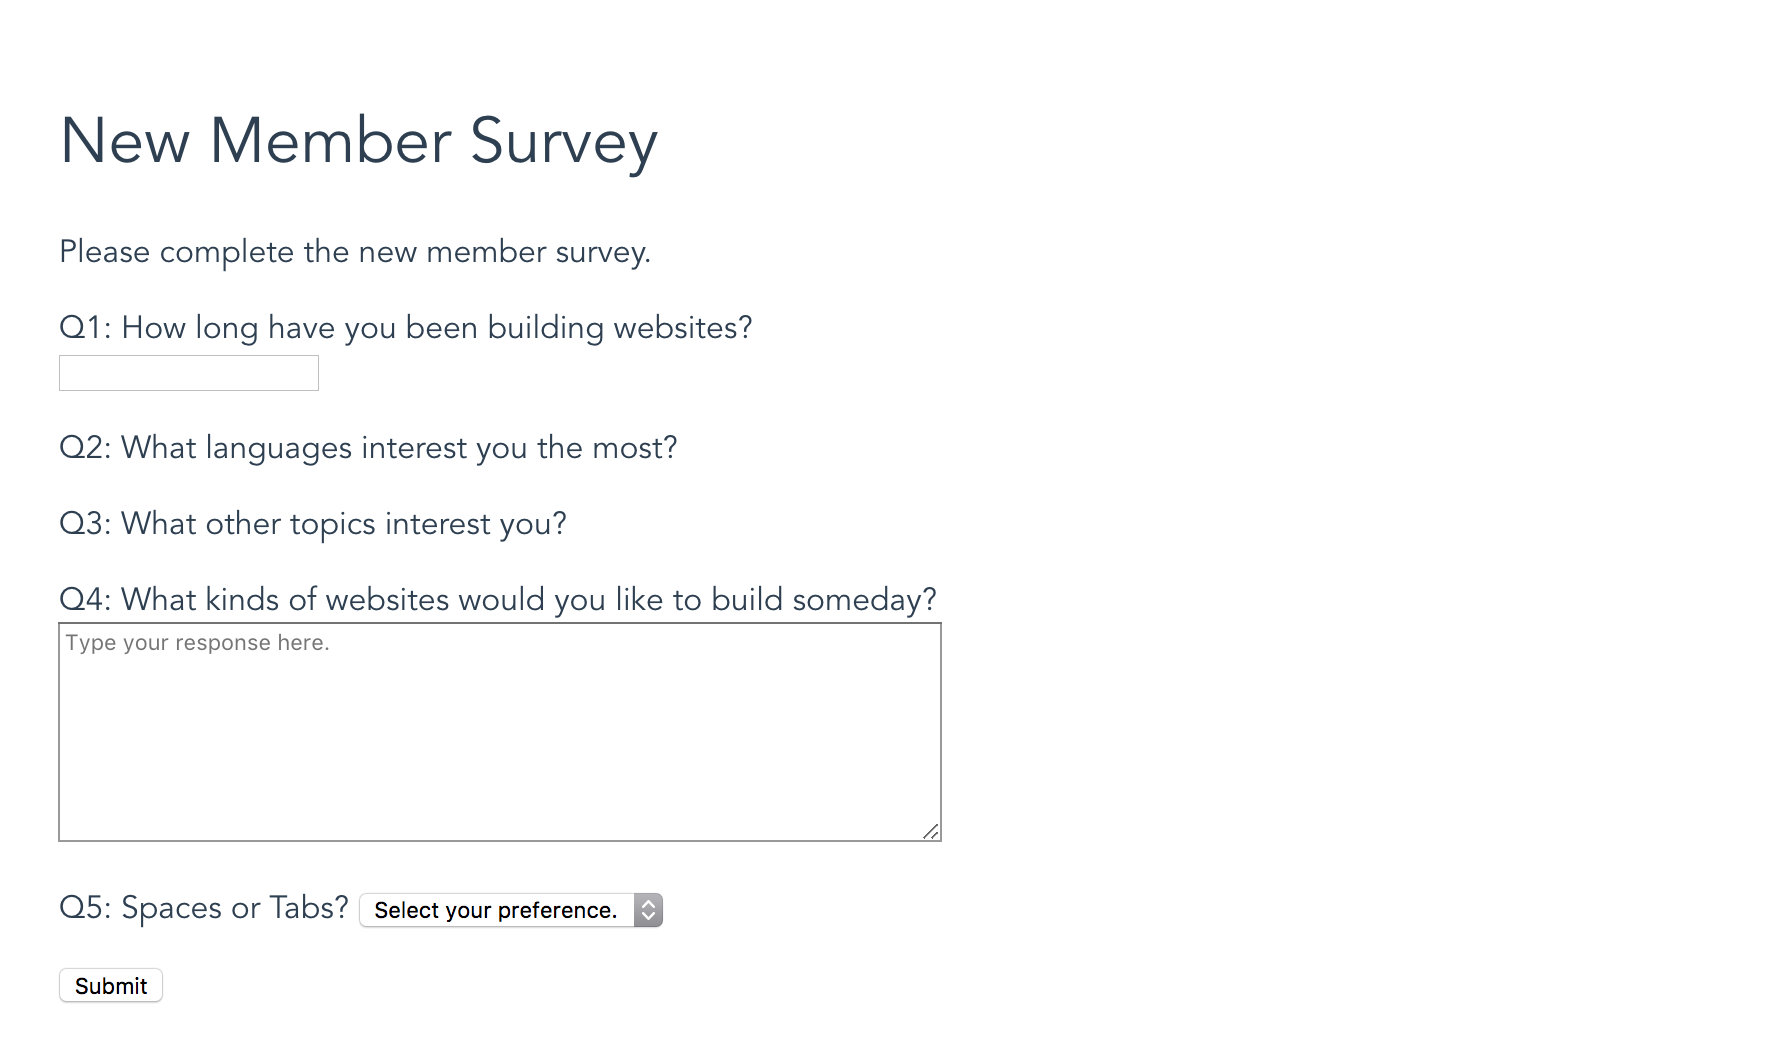
Starting Survey View
The image above shows what the starting Survey view looks like. It can be accessed at http://localhost:8080/#/survey. Right now we must manually type in that URL, but we will eventually add a link in the success message on the Home component. Notice that although we see some form fields here, we do not actually have choices for the questions. Let's finish out the form in the Survey component so we can see the completed page.
Creating the Form in Survey.vue
This form is partially there for us. We have to add the v-on directive to the <form> tag so we can properly handle the submit event. We will also need to use the .prevent modifier, just like we did with the sign up form on the Home component.
We also need to set up an error message the same way we did on the Home component. We can see that the component data object already contains a showError value, so we can use the same method to make this error message appear and hide:
<p class="error" v-show="showError">Please check the information you have entered. Be sure to fill in all fields.</p>
The next TODO asks us to set the model on the q1 input. This is a pretty simple addition:
<input type="text" id="q1" v-model="q1">
We will use the same kind of v-model directive just like we did with the Home component. The next question present us with a somewhat different challenge: We must create a loop on the <input> element and use it to populate the form with a set of checkboxes based on the information stored in the languageOptions array:
<p>Q2: What languages interest you the most?<br>
  <label v-for="language in languageOptions">
    <input type="checkbox" v-model="q2" v-bind:value="language.value">
    {{ language.text }}
  </label>
</p>
In this example we see that we have used v-for to set up the loop on the <label> tag. This will duplicate the label and all the children elements it contains for each item in the languageOptions Array, which is defined as part of the component's data object. The languageOptions Array contains objects that have two properties: value and text. These two properties are used in the appropriate places to output the right information into the template.
Since all of these checkboxes are meant to be part of the same question (and we want to record which checkboxes are checked in the q2 Array), we give each input field the same v-model name. However, we want to alter the value attribute according to the information in the Array. This is accomplished using the v-bind directive on the value attribute. We finish out by simply printing the text property for use as the label on our checkbox.
Question 3 uses the same checkbox group setup that Question 2 used, so we will essentially create the same template structure, using the topicOptions Array instead of the languageOptions Array:
<p>Q3: What other topics interest you?<br>
  <label v-for="topic in topicOptions">
    <input type="checkbox" v-model="q3" v-bind:value="topic.value">
    {{ topic.text }}
  </label>
</p>
We can continue through the TODO notes adding the v-model directives to their respective input fields until the form is complete. Once we're done, we should have a form that looks like this:
<form v-on:submit.prevent="validateForm">
  <p class="error" v-show="showError">Please check the information you have entered. Be sure to fill in all fields.</p>
  <p><label for="q1">Q1: How long have you been building websites?<br><input type="text" id="q1" v-model="q1"></label></p>
  <p>Q2: What languages interest you the most?<br>
    <label v-for="language in languageOptions">
      <input type="checkbox" v-model="q2" v-bind:value="language.value">
      {{ language.text }}
    </label>
  </p>
  <p>Q3: What other topics interest you?<br>
    <label v-for="topic in topicOptions">
      <input type="checkbox" v-model="q3" v-bind:value="topic.value">
      {{ topic.text }}
    </label>
  </p>
  <p>
    <label for="q4">Q4: What kinds of websites would you like to build someday?<br>
      <textarea cols="70" rows="8" id="q4" placeholder="Type your response here." v-model="q4"></textarea>
    </label>
  </p>
  <p>
    <label for="q5">Q5: Spaces or Tabs?
      <select id="q5" v-model="q5">
        <option value="">Select your preference.</option>
        <option value="spaces">Spaces</option>
        <option value="tabs">Tabs</option>
      </select>
    </label>
  </p>
  <p><input type="submit" value="Submit"></p>
</form>
Now we can see our completed form in action:
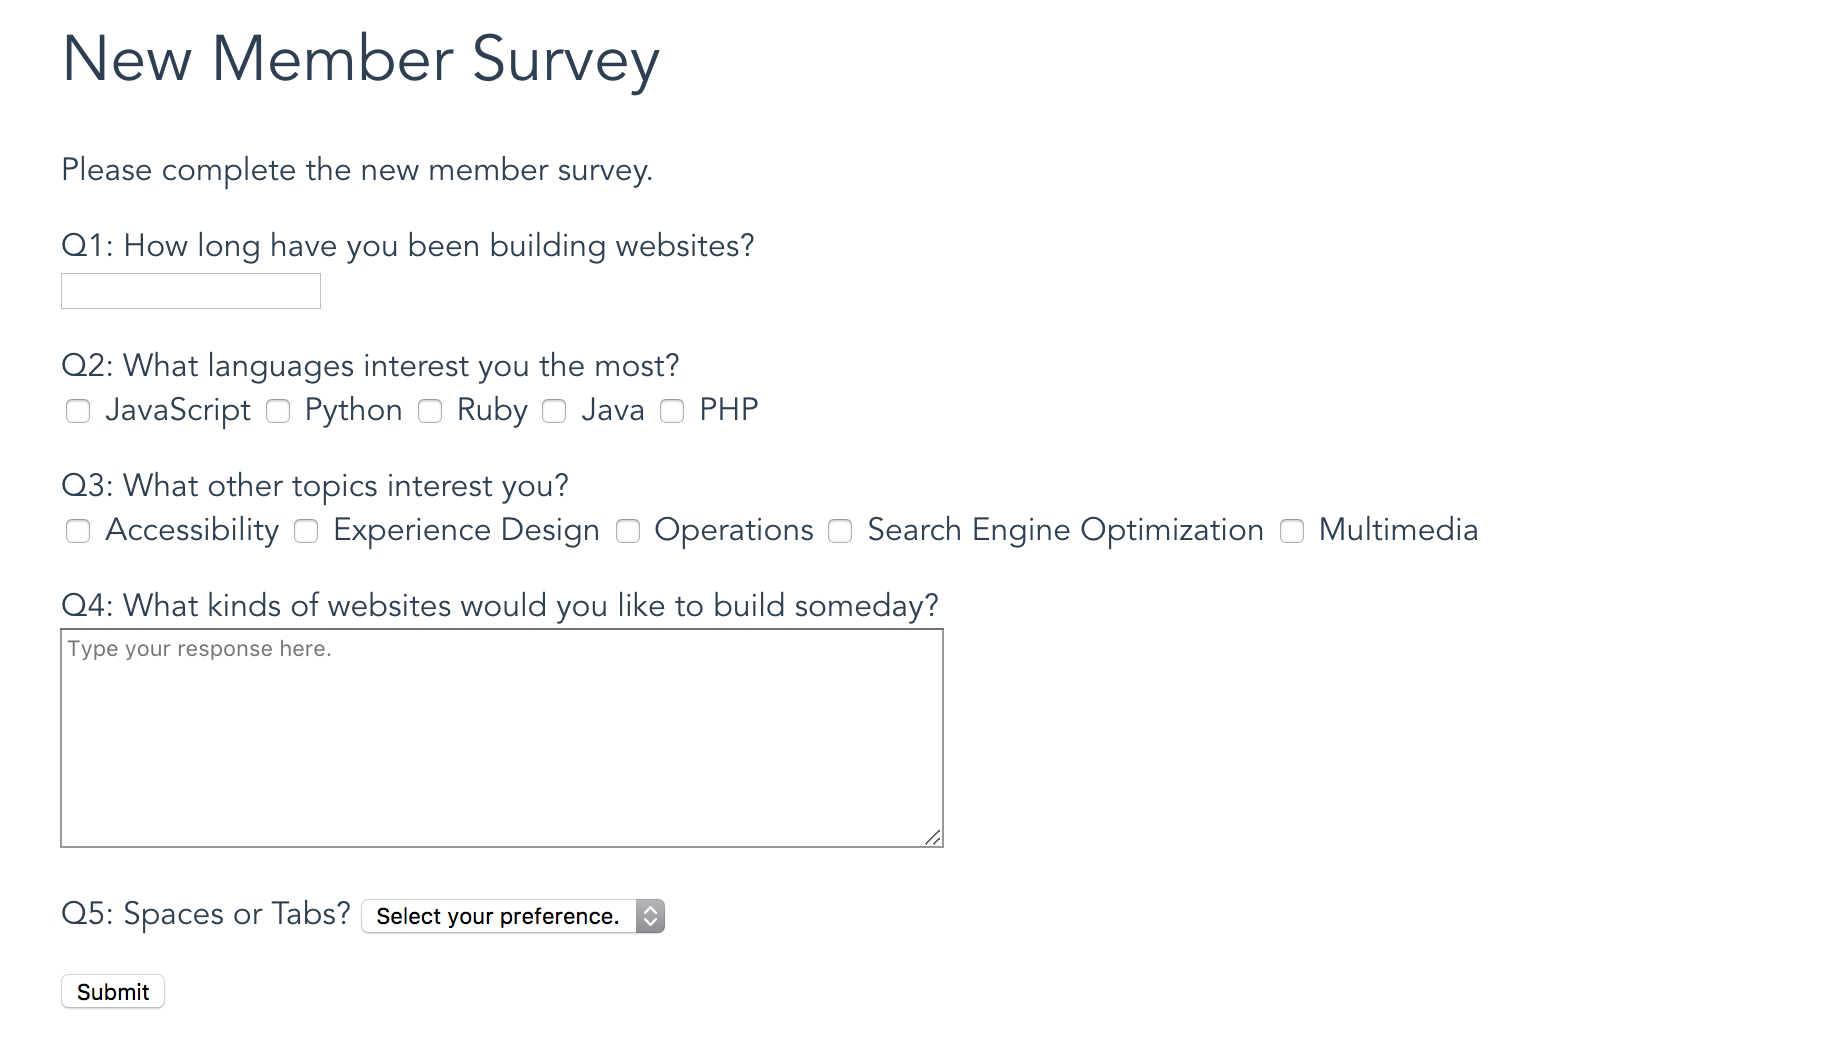
Completed Survey Form
We have all of our choices available and everything should be all connected in the template. Let's take a moment to add that link on the Home component to get users to this view.
Adding the Link to the Survey from the Home View
Adding the link for a user to click is very easy. Since we have used name routes, we can reference the name of the route. We only need to open the src/views/Home.vue file and add a single <router-link> tag inside the success message:
<p>Please take our new member survey. <router-link to="/survey">Click here</router-link></p>
Once we have this, we can return to the home of our project (http://localhost:8080/#/) and fill in the sign up form. When we have successfully submitted valid data, we should see the link show up. Clicking the link should take us back to the Survey view. Here is what it looks like:
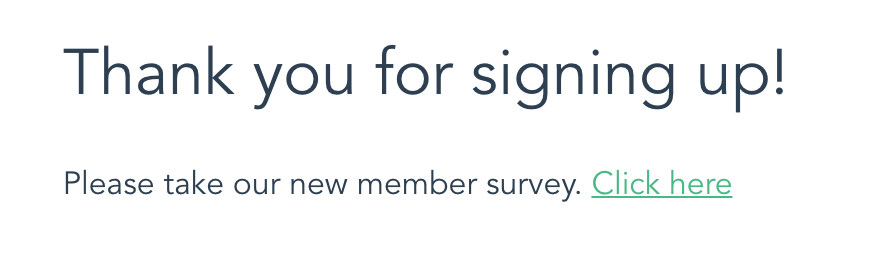
Survey Link on Home View
Creating the Secret View
The next thing we need to do is create a brand new component to run the Secret view. This is a view that should convey some helpful tip about web development (or, really, you can put anything you want on this page).
To begin, create a new file in src/views/ called Secret.vue. We can use the boilerplate component code included earlier in the Routing and URLs section to start us off:
<template>
  <div class="component">
    <h2>{{ message }}</h2>
  </div>
</template>

<script>
  export default {
    data () {
      return {
        message: 'This component works.'
      }
    }
  }
</script>

<style scoped>
  .component {
    background: #e8e8e8;
    min-height: 400px;
  }
</style>
We can modify the message to say whatever we would like. We can also alter the template in whatever way we prefer. And, of course, we can change the styles to fit our needs. Once we have created the basic component we can save this file and add the Secret view to our routes definition so we can preview our work.
Adding the Secret View to the Routes Array
Adding the Secret view to the routes Array is pretty much the same as adding the Survey view previously. Once we are done, we should be able to visit http://localhost:8080/#/Secret to see our new view:

Secret View
Obviously we will each have a different secret tip, but feel free to use this one if you are stumped. Now we only need to finish the validation method for the Survey component, and then we will be completely finished with this project.
Finishing the Validation Method for the Survey
The last bit of work we must complete is to finish the validation method for the Survey component. This is mostly like the previous validateForm method we wrote in the Home component, except the rules are a little different.
This time out, we want to verify the following:
q1is not blankq2is an Array with the length greater than zeroq3is an Array with the length greater than zeroq4is not blankq5is not blank
We can, once again, validate the data using a conditional with a set of conditional statements:
methods: {
  validateForm: function () {
    if ((this.q1 != '') &&
        (this.q2.length > 0) &&
        (this.q3.length > 0) &&
        (this.q4 != '') &&
        (this.q5 != '')) {
      // Form is valid
      this.$router.push('secret');
    } else {
      this.showError = true;
    }
  }
}
When the form is valid, the validation method will execute this.$router.push('secret');, which moves the user to the Secret view. This is the programmatic way of moving the user to different locations in the application (as opposed to just asking the user to click, like we did on the Home view).
Now that we've added this code, we can test the Survey view and see that when we fill out the form successfully it moves us to the Secret view. Huzzah! We are done!
Wrapping Up
Several files have been modified to complete this project. Here are the complete files so we can check our work against them.
src/views/Home.vue
Full file contents:
<template>
  <div class="home">
    <div class="form-container" v-show="showForm">
      <h1>Join the Web Developers Club!</h1>
      <p>Sign up to access our special, secret page. Just create an account and answer a brief survey.</p>

      <p class="error" v-show="showError">Please check the information you have entered. Be sure to fill in all fields.</p>

      <form v-on:submit.prevent="validateForm">

        <p><label for="username">Username <input type="text" id="username" v-model="username"></label></p>
        <p><label for="email">Email <input type="email" id="email" v-model="email"></label></p>
        <p><label for="password">Password <input type="password" id="password" v-model="password"></label></p>
        <p><label for="passwordVerify">Verify Password <input type="password" id="passwordVerify" v-model="passwordVerify"></label></p>

        <p><input type="submit" value="Submit"></p>
      </form>
    </div>
    <div class="success-message" v-show="!showForm">
      <h1>Thank you for signing up!</h1>
      <p>Please take our new member survey. <router-link to="/survey">Click here</router-link></p>
    </div>
  </div>
</template>

<script>
export default {
  name: 'Home',
  data () {
    return {
      username: '',
      email: '',
      password: '',
      passwordVerify: '',
      showForm: true,
      showError: false
    }
  },
  methods: {
    validateForm: function () {
      if ((this.username != '') &&
          (this.email != '') &&
          (this.password === this.passwordVerify)){
        // Form data is valid, so turn off the form to show the success message.
        this.showForm = false;
      } else {
        // Form data is NOT valid, so show the error message.
        this.showError = true;
      }
    }
  }
}
</script>

<style scoped>
h1, h2 {
  font-weight: normal;
}
.error {
  border: 1px solid #aa0000;
  padding: 1rem;
  color: #aa0000;
}

ul {
  list-style-type: none;
  padding: 0;
}

li {
  display: inline-block;
  margin: 0 10px;
}

a {
  color: #42b983;
}
</style>
src/views/Survey.vue
Full file contents:
<template>
  <div class="survey">
      <h1>New Member Survey</h1>
      <p>Please complete the new member survey.</p>
      <form v-on:submit.prevent="validateForm">
        <p class="error" v-show="showError">Please check the information you have entered. Be sure to fill in all fields.</p>

        <p><label for="q1">Q1: How long have you been building websites?<br><input type="text" id="q1" v-model="q1"></label></p>

        <p>Q2: What languages interest you the most?<br>
          <label v-for="language in languageOptions">
            <input type="checkbox" v-model="q2" v-bind:value="language.value">
            {{ language.text }}
          </label>
        </p>

        <p>Q3: What other topics interest you?<br>
          <label v-for="topic in topicOptions">
            <input type="checkbox" v-model="q3" v-bind:value="topic.value">
            {{ topic.text }}
          </label>
        </p>
        <p>
          <label for="q4">Q4: What kinds of websites would you like to build someday?<br>
            <textarea cols="70" rows="8" id="q4" placeholder="Type your response here." v-model="q4"></textarea>
          </label>
        </p>
        <p>
          <label for="q5">Q5: Spaces or Tabs?
            <select id="q5" v-model="q5">
              <option value="">Select your preference.</option>
              <option value="spaces">Spaces</option>
              <option value="tabs">Tabs</option>
            </select>
          </label>
        </p>
        <p><input type="submit" value="Submit"></p>
      </form>
  </div>
</template>

<script>
export default {
  name: 'Survey',
  data () {
    return {
      showError: false,
      q1: '',
      q2: [],
      q3: [],
      q4: '',
      q5: '',
      languageOptions: [
        {
            text: 'JavaScript',
            value: 'js'
        },
        {
            text: 'Python',
            value: 'py'
        },
        {
            text: 'Ruby',
            value: 'ruby'
        },
        {
            text: 'Java',
            value: 'java'
        },
        {
            text: 'PHP',
            value: 'php'
        }
      ],
      topicOptions: [
        {
            text: 'Accessibility',
            value: 'axe'
        },
        {
            text: 'Experience Design',
            value: 'ux'
        },
        {
            text: 'Operations',
            value: 'ops'
        },
        {
            text: 'Search Engine Optimization',
            value: 'seo'
        },
        {
            text: 'Multimedia',
            value: 'media'
        }
      ]
    }
  },
  methods: {
    validateForm: function () {
      if ((this.q1 != '') &&
          (this.q2.length > 0) &&
          (this.q3.length > 0) &&
          (this.q4 != '') &&
          (this.q5 != '')) {
        // Form is valid
        this.$router.push('secret');
      } else {
        this.showError = true;
      }
    }
  }
}
</script>

<!-- Add "scoped" attribute to limit CSS to this component only -->
<style scoped>
.error {
  border: 1px solid #aa0000;
  padding: 1rem;
  color: #aa0000;
}
h1, h2 {
  font-weight: normal;
}

ul {
  list-style-type: none;
  padding: 0;
}


a {
  color: #42b983;
}
</style>
src/views/Secret.vue
Full file contents:
<template>
    <div>
        <h2>{{ message }}</h2>
    </div>
</template>

<script>
export default {
    data () {
        return {
            message: 'Always look in the devtools.'
        }
    }
}
</script>

<style scoped>

</style>
router.js
Full file contents:
import Vue from 'vue'
import Router from 'vue-router'
import Home from '@/views/Home'
import Survey from '@/views/Survey'
import Secret from '@/views/Secret'

Vue.use(Router)

export default new Router({
  routes: [
    {
      path: '/',
      name: 'home',
      component: Home
    },
    {
        path: '/survey',
        name: 'survey',
        component: Survey
    },
    {
        path: '/secret',
        name: 'secret',
        component: Secret
    }
  ]
})
Build and Deploy
Once we've finished our work, we can build and deploy the project. This project has been configured to build to the docs/ directory, so we can follow the same pattern we used before:
- Execute the
npm run buildcommand to build the files into thedocs/directory. - Commit all of our code.
- Push the code up to GitHub.
- Go into the repository settings and set the GH Pages section to publish from the
docs/directory.
The project should now be up and available to the public through GH Pages.
Stretch Goals
There are many more fun things we can do with this project. The README.md file lists several possible stretch goals:
- Add a navigation element to the
src/App.vuetemplate, and be sure to use therouter-link-activeclass to style the current page link - Add more pages of content to the site to practice creating new components from scratch and adding them to the routes Array
And it's still worthwhile to pursue the stretch goals from the previous portion of this project:
- Enhance the sign up form to collect additional info, different info, or to use different input types to collect the data
- Enhance the validation to be more specific (e.g. verify no numbers in the name, or there is an
@and a.in the email address, etc.) - Enhance error messages to be more specific (e.g. build a message that mentions which field is causing the problem)
There are many other ways we could push this forward. Feel free to explore and experiment with forms and methods to handle user input. Keep pushing, and have fun!