Project: Application Architecture and Refactoring Practice
The Refactoring Practice project repository provides you with a working weather application that can be improved through refactoring. The weather app uses three major views: City Search, Current Weather, and 5 Day Forecast. Users can search for their city and then view weather data. The weather data is requested from the OpenWeatherMap.org API, which is free and available for any developer to use. (NOTE: You will need to sign up to get an OpenWeatherMap.org API Key to complete this project.)
In the initial state, this application will work (once you insert your API key into the proper locations), but the structure of the application could be significantly improved. We will practice creating child components that can accept data from the parent component, abstract base API configurations away from each individual API call, and consolidate other HTML and CSS blocks to minimize the pain of maintenance.
Review the Requirements
In order to complete this project, we must fulfill the following Basic Requirements. These requirements are all focused around refactoring the application into a more organized structure that will make future maintenance and improvements easier. Remember that we are not trying to improve the performance or add any new features to the project. The goal here is purely around refactoring. The end result should appear to the user exactly like the current version.
- Sign up to OpenWeatherMap.org and generate an API Key.
- Paste your API Key (which will be used as the
APPIDparameter) into the appropriate locations in theCitySearch.vue,CurrentWeather.vue, andForecast.vuefiles. - Verify the site works with your key. You should be able to search for a city and see weather data.
- Abstract the base configuration for the API requests to a common file to reduce duplication of the base URL and
APPID. - Create child components that can accept weather information and produce a well-formatted display.
- Use the child components in each of the views to eliminate the redundant HTML and CSS styles used.
- Create a child component called
ErrorListto handle display of error messages. Replace the error message handling in the templates of the three parent components with this child component. - Clean up any extraneous code, comments, or files that are unused.
- Add comments where they would be helpful to improve the readability of the project.
Working the Project
In order to get this project working, we should first fork the repository from the main Refactoring Practice repository, then we should clone the files to our local development area. We will need to install the project dependencies by running npm install from the project root directory.
Make an OpenWeatherMap.org API Key
To get the project running, we need to make an account on OpenWeatherMap.org and generate an API key. Once we have created an account, the API Keys can be found under our Account page (located here). Create a new API Key and then open the project repository in a preferred editor. We must find the YOUR_APPID_HERE placeholders in the CitySearch.vue, CurrentWeather.vue and Forecast.vue files and replace those placeholders with our actual API Key (called an APPID by OpenWeatherMap.org).
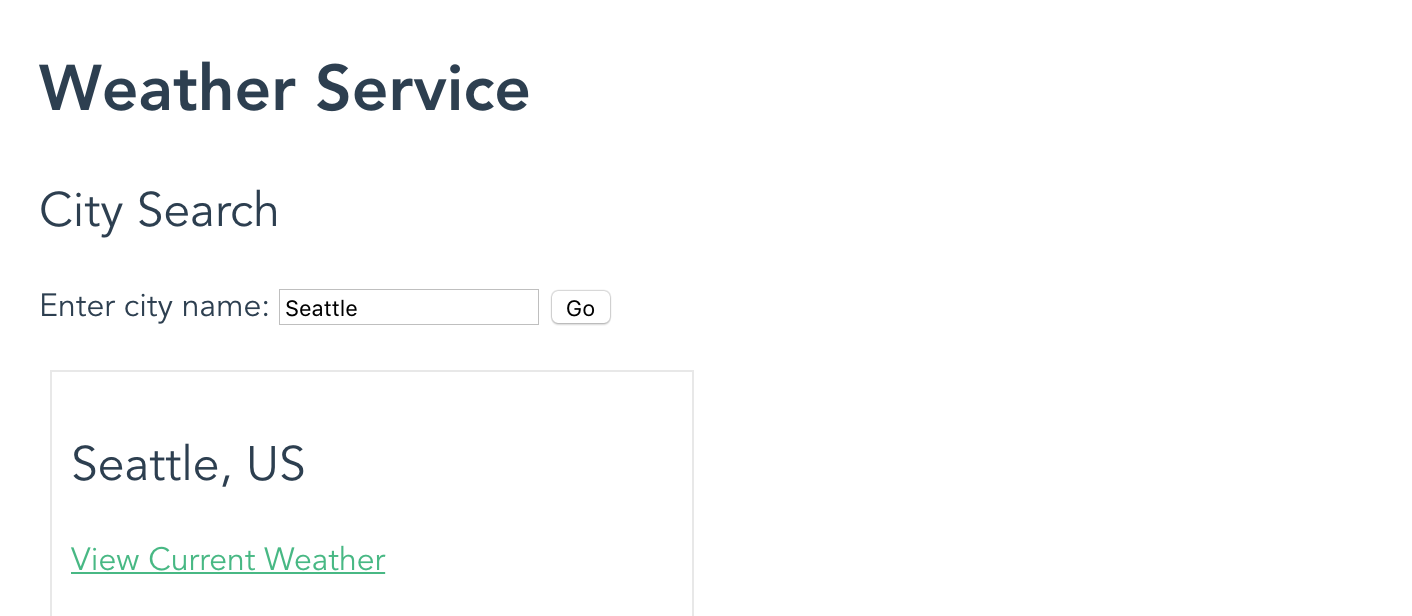
Working home screen
Once we've replaced that information the project should become operational. Run npm run dev and verify that the project works. Once we've made sure the project is working, we can begin refactoring.
Abstract the Base API Configuration
The first thing we can do to make a major improvement in this application is to consolidate the base configuration for our API into a common module that can be imported into whatever component we need. We can do this using a few basic features available in axios, the module we are using to handle HTTP requests to our API services.
Let's start by making a new directory under src/ called common/. Then, we will create the file src/common/api.js. Inside that file, we will write the following code:
import axios from 'axios';

export const API = axios.create({
  baseURL: `//api.openweathermap.org/data/2.5/`
})
API.interceptors.request.use(function (config) {
    // Set common parameters on each request
    config.params.APPID = 'YOUR_APPID_HERE';
    config.params.units = 'imperial';
    return config;
  }, function (error) {
    return Promise.reject(error);
  });
The code above creates a new const variable called API. The API object is initialized with the axios.create() method, which returns an HTTP request object. We use the export keyword to declare the API value because we want to be able to import the API object wherever we need to use it. Notice that we set the base_url to //api.openweathermap.org/data/2.5/. We have omitted the http:, which is a common technique to allow the browser to fill in whatever the current protocol is. If our site is deployed on an http server, then it will prepend http:; if it is deployed on an https server, then the browser will prepend https:. This way we avoid any security warnings by using http or https at the wrong time.
After we have created the API object, we set up an interceptor on the base configuration. The interceptor will watch for any request that is made using the API object. For each request it will "intercept" the data before it is sent, and it will add two properties to the params object: APPID and units. Since these values were the same in each request, we can safely include them in this interceptor and we do not need to repeat them in each component where we use the API object.
Once we have this base configuration in place, we can update our components to make use of the new, leaner API object. We will need to update the API calls in all three of our components. Here is the first update for an example:
CitySearch.vue
<script>
import {API} from '@/common/api';

export default {
  name: 'CitySearch',
  data () {
    return {
      results: null,
      errors: [],
      query: ''
    }
  },
  methods: {
    getCities: function () {
      API.get('find', {
        params: {
            q: this.query
        }
      })
      .then(response => {
        this.results = response.data
      })
      .catch(error => {
        this.errors.push(error)
      });
    }
  }
}
</script>
Notice that we have updated the import statement to import the API object instead of axios directly. We have simplified the API request in the getCities method, too: it is now several lines shorter. It only needs to provide the unique endpoint (in this case, find) and the unique params (in this case the q param is populated with the user's query value).
Once we have made these changes, the component functions just as it did before. We can now make the changes in each of the remaining components and then we are done with the first portion of this refactoring project.
Create Child Components to Display Weather Information
There are two places where it appears we have serious redundancy in our templates. These two locations can be isolated into child components that will accept data from their parent. They do not need to process any data or make any additional API requests, so they should be relatively lean components.
Weather Summary
First, we will break up the weatherSummary section into a child component. We can see that this code is repeated in each of the three main components:
<div v-for="weatherSummary in city.weather" class="weatherSummary">
    <img v-bind:src="'http://openweathermap.org/img/w/' + weatherSummary.icon + '.png'" v-bind:alt="weatherSummary.main">
    <br>
    <b>{{ weatherSummary.main }}</b>
</div>
This summary area of the data is always an array that must be iterated through. It often only has one item in the array, but sometimes it will have more. For each item in the array we want to show the icon and the summary text. We can create a new component called WeatherSummary that will handle this HTML code:
<template>
  <div>
    <div v-for="weatherSummary in weatherData" class="weatherSummary">
      <img v-bind:src="'http://openweathermap.org/img/w/' + weatherSummary.icon + '.png'" v-bind:alt="weatherSummary.main">
      <br>
      <b>{{ weatherSummary.main }}</b>
    </div>
  </div>
</template>

<script>
export default {
  name: 'WeatherSummary',
  data () {
    return {

    }
  },
  props: {
    weatherData: {}
  }
}
</script>

<style scoped>
  .weatherSummary {
    display: inline-block;
    width: 100px;
  }
</style>
As we can see, this new child component is completely dedicated to displaying these weather summary items. It does not have any terribly complex behavior. It simply expects an array of weatherSummary objects, and it will process those the same way each time. We can now add this component into our main components that control our views. Here is what it looks like when used in the CitySearch component:
<template>
  <div>
    ... template code ...

    <weather-summary v-bind:weatherData="city.weather"></weather-summary>

    ... more template code ...
  </div>
</template>

<script>
import {API} from '@/common/api';
import WeatherSummary from '@/components/WeatherSummary';

export default {
  name: 'CitySearch',
  data () {
    return {
      results: null,
      errors: [],
      query: ''
    }
  },
  methods: {
    getCities: function () {
      API.get('find', {
        params: {
            q: this.query
        }
      })
      .then(response => {
        this.results = response.data
      })
      .catch(error => {
        this.errors.push(error)
      });
    }
  },
  components: {
    'weather-summary': WeatherSummary
  }
}
</script>
In this example, we can see that the <weather-summary> element is used. We have imported the WeatherSummary child component at the top of our component logic, and then we have defined a components object that indicates we will be using the WeatherSummary in our templates. We must use v-bind to pass the value of city.weather to the WeatherSummary, where it comes in as the WeatherData property.
Now that we have this component in place in the CitySearch component we can test things out and then follow the same process to add the child component to our CurrentWeather and Forecast components. Note that the name of the value we pass to the WeatherSummary component changes in each instance where it is used:
CurrentWeather.vue
<weather-summary v-bind:weatherData="weatherData.weather"></weather-summary>
Forecast.vue
<weather-summary v-bind:weatherData="forecast.weather"></weather-summary>
In each case, we pass in the proper weather array that can be processed by the WeatherSummary component.
Weather Data
The other portion of the component templates that is repetitive is the weather data display. This structure is repeated almost verbatim in several places:
<dl>
<dt>Humidity</dt>
<dd>{{ forecast.main.humidity }}%</dd>
<dt>High</dt>
<dd>{{ forecast.main.temp_max }}°F</dd>
<dt>Low</dt>
<dd>{{ forecast.main.temp_min }}°F</dd>
</dl>
There are also several style definitions that target this HTML, and those are also duplicated in each component. If we allowed the code to remain so repetitive we would undoubtedly see the gradual evolution of these styles and this markup diverge as small tweaks were made to different components and developers unwittingly reproduced work that had already been done.
Rather than living with this duplication, we can isolate this display into a single component that can be used whenever we need this structure. Let's call this component WeatherConditions. Here is a draft of what this component might look like:
<template>
<div>
<dl>
<dt v-if="conditions.temp != conditions.temp_min">Current Temperature</dt>
<dd v-if="conditions.temp != conditions.temp_min">{{ conditions.temp }}%</dd>
<dt>Humidity</dt>
<dd>{{ conditions.humidity }}%</dd>
<dt>High</dt>
<dd>{{ conditions.temp_max }}°F</dd>
<dt>Low</dt>
<dd>{{ conditions.temp_min }}°F</dd>
</dl>
</div>
</template>
<script>
export default {
name: 'WeatherConditions',
data () {
return {
}
},
props: {
conditions: {}
}
}
</script>
<style scoped>
dl {
padding: 5px;
background: #e8e8e8;
}
dt {
float: left;
clear: left;
width: 120px;
text-align: right;
font-weight: bold;
color: blue;
}
dd {
margin: 0 0 0 130px;
padding: 0 0 0.5em 0;
}
dt::after {
content: ":";
}
</style>
This component can be passed the main object from any of our API responses and it will output the properly-formatted weather condition data: humidity, high temp, and low temp. This has removed almost 20 lines of CSS and 8 lines of HTML from each of the other components, and it has isolated this functionality into a single location where we could focus our work if we needed to enhance this output. We can use this child component in our other component templates just like we did with the WeatherSummary component (see the full file text below for an example of how to use this component inside of our other components).
Create ErrorList Child Component
Now that we've done this twice, separating the errors list out into a child component should be a snap. This component will expect the errors array as a property, and then it will process and display those errors. Again, this child component only needs to receive and display data, so it will not need to implement any custom events.
To accomplish this refactoring, we need to create a new file for the ErrorList component. This is what it should look like:
<template>
  <div>
    <div v-if="errorList.length > 0">
      <h2>There was an error fetching data.</h2>
      <ul class="errors">
        <li v-for="error in errorList">{{ error }}</li>
      </ul>
    </div>
  </div>
</template>

<script>
export default {
  name: 'ErrorList',
  data () {
    return {

    }
  },
  props: {
    errorList: []
  }
}
</script>

<style scoped>
  .errors li {
    color: red;
    border: solid red 1px;
    padding: 5px;
  }
</style>
This new child component can be used in each of our main components and will allow us to eliminate another dozen or so lines of code in each of those main components. It will also consolidate the error listing feature, which allows us to more easily focus on improving that feature when we choose to do so (without risking unnecessary complications in our other components).
We can implement this new child component using the same patterns we established before. See the example code below for details about how to implement this child component.
Clean Up Extraneous Files
There are several files that appear to be remnants of previous development. Clean up the extra file in the src/components/ directory and the extra experimental data file. Take another pass through all of the code files and remove any extraneous TODO comments or other irrelevant comments.
Enhance Comments
If we haven't already been conscientious about commenting our changes so developers reviewing our work will be able to tell how things work, then now is the time to go back through and do that work. We must leave comments that allow developers to more quickly understand non-obvious details about the code and how to use it.
Wrapping Up
Now that we've completed the project, here are what each of our files look like in their entirety. We can reference these examples to check our own work.
Components
CitySearch.vue
<template>
  <div>
    <h2>City Search</h2>
    <form v-on:submit.prevent="getCities">
        <p>Enter city name: <input type="text" v-model="query" placeholder="Paris, TX"> <button type="submit">Go</button></p>
    </form>
    <ul class="cities" v-if="results && results.list.length > 0">
        <li v-for="city in results.list">
            <h2>{{ city.name }}, {{ city.sys.country }}</h2>
            <p><router-link v-bind:to="{ name: 'CurrentWeather', params: { cityId: city.id } }">View Current Weather</router-link></p>

            <weather-summary v-bind:weatherData="city.weather"></weather-summary>

            <weather-conditions v-bind:conditions="city.main"></weather-conditions>

        </li>
    </ul>
    <error-list v-bind:errorList="errors"></error-list>

  </div>
</template>

<script>
import {API} from '@/common/api';
import WeatherSummary from '@/components/WeatherSummary';
import WeatherConditions from '@/components/WeatherConditions';
import ErrorList from '@/components/ErrorList';

export default {
  name: 'CitySearch',
  data () {
    return {
      results: null,
      errors: [],
      query: ''
    }
  },
  methods: {
    getCities: function () {
      API.get('find', {
        params: {
            q: this.query
        }
      })
      .then(response => {
        this.results = response.data
      })
      .catch(error => {
        this.errors.push(error)
      });
    }
  },
  components: {
    'weather-summary': WeatherSummary,
    'weather-conditions': WeatherConditions,
    'error-list': ErrorList
  }
}
</script>

<style scoped>
h1, h2 {
  font-weight: normal;
}

ul {
  list-style-type: none;
  padding: 0;
}
li {
  display: inline-block;
  width: 300px;
  min-height: 300px;
  border: solid 1px #e8e8e8;
  padding: 10px;
  margin: 5px;
}
a {
  color: #42b983;
}
</style>
CurrentWeather.vue
<template>
  <div>
    <h2>Current Weather <span v-if="weatherData"> for {{ weatherData.name }}, {{weatherData.sys.country }}</span></h2>
    <p>
      <router-link to="/">Home</router-link> |
      <router-link v-bind:to="{ name: 'Forecast', params: { cityId: $route.params.cityId } }">View 5-Day Forecast</router-link>
    </p>
    <div v-if="weatherData && errors.length===0">

      <weather-summary v-bind:weatherData="weatherData.weather"></weather-summary>
      <weather-conditions v-bind:conditions="weatherData.main"></weather-conditions>
    </div>
    <div v-else>
      <h2>Loading...</h2>
    </div>
    <error-list v-bind:errorList="errors"></error-list>
  </div>
</template>

<script>
import {API} from '@/common/api';
import WeatherSummary from '@/components/WeatherSummary';
import WeatherConditions from '@/components/WeatherConditions';
import ErrorList from '@/components/ErrorList';

export default {
  name: 'CurrentWeather',
  data () {
    return {
      weatherData: null,
      errors: [],
      query: ''
    }
  },
  created () {
    API.get('weather', {
      params: {
          id: this.$route.params.cityId
      }
    })
    .then(response => {
      this.weatherData = response.data
    })
    .catch(error => {
      this.errors.push(error)
    });
  },
  components: {
    'weather-summary': WeatherSummary,
    'weather-conditions': WeatherConditions,
    'error-list': ErrorList
  }
}
</script>

<style scoped>
h1, h2 {
  font-weight: normal;
}

ul {
  list-style-type: none;
  padding: 0;
}
li {
  display: inline-block;
  width: 300px;
  min-height: 300px;
  border: solid 1px #e8e8e8;
  padding: 10px;
}
a {
  color: #42b983;
}
</style>
Forecast.vue
<template>
  <div>
    <h2>Five Day Hourly Forecast <span v-if="weatherData"> for {{ weatherData.city.name }}, {{weatherData.city.country }}</span></h2>
    <p>
      <router-link to="/">Home</router-link> |
      <router-link v-bind:to="{ name: 'CurrentWeather', params: { cityId: $route.params.cityId } }">Current Weather <span v-if="weatherData"> for {{ weatherData.city.name }}, {{weatherData.city.country }}</span></router-link>
    </p>

    <ul v-if="weatherData && errors.length===0" class="forecast">
      <li v-for="forecast in weatherData.list">
        <h3>{{ forecast.dt|formatDate }}</h3>
        <weather-summary v-bind:weatherData="forecast.weather"></weather-summary>
        <weather-conditions v-bind:conditions="forecast.main"></weather-conditions>
      </li>
    </ul>
    <div v-else>
      <h2>Loading...</h2>
    </div>
    <error-list v-bind:errorList="errors"></error-list>

  </div>
</template>

<script>
import {API} from '@/common/api';
import WeatherSummary from '@/components/WeatherSummary';
import WeatherConditions from '@/components/WeatherConditions';
import ErrorList from '@/components/ErrorList';

export default {
  name: 'Forecast',
  data () {
    return {
      weatherData: null,
      errors: [],
      query: ''
    }
  },
  created () {
    API.get('forecast', {
      params: {
          id: this.$route.params.cityId
      }
    })
    .then(response => {
      this.weatherData = response.data
    })
    .catch(error => {
      this.errors.push(error)
    });
  },
  filters: {
    formatDate: function (timestamp){
      let date = new Date(timestamp * 1000);
      const months = ['January', 'February', 'March', 'April', 'May', 'June', 'July', 'August', 'September', 'October', 'November', 'December'];
      const weekdays = ['Sunday', 'Monday', 'Tuesday', 'Wednesday', 'Thursday', 'Friday', 'Saturday'];
      let daynum = date.getDate();
      let month = date.getMonth();

      let hour = date.getHours();
      if (hour === 12) {
        hour = 'Noon';
      } else if (hour === 0) {
        hour = 'Midnight';
      } else if (hour > 12) {
        hour = hour - 12 + 'PM';
      } else if (hour < 12) {
        hour = hour + 'AM';
      }
      return `${ months[month] } ${ daynum } @ ${ hour }`;
    }
  },
  components: {
    'weather-summary': WeatherSummary,
    'weather-conditions': WeatherConditions,
    'error-list': ErrorList
  }
}
</script>

<style scoped>
h1, h2 {
  font-weight: normal;
}

ul {
  list-style-type: none;
  padding: 0;
}
li {
  display: inline-block;
  width: 200px;
  min-height: 300px;
  border: solid 1px #e8e8e8;
  padding: 10px;
  margin: 5px;
}

a {
  color: #42b983;
}
</style>
WeatherSummary.vue
<template>
  <div>
    <div v-for="weatherSummary in weatherData" class="weatherSummary">
      <img v-bind:src="'http://openweathermap.org/img/w/' + weatherSummary.icon + '.png'" v-bind:alt="weatherSummary.main">
      <br>
      <b>{{ weatherSummary.main }}</b>
    </div>
  </div>
</template>

<script>
export default {
  name: 'WeatherSummary',
  data () {
    return {

    }
  },
  props: {
    weatherData: {}
  }
}
</script>

<style scoped>
  .weatherSummary {
    display: inline-block;
    width: 100px;
  }
</style>
WeatherConditions.vue
<template>
<div>
<dl>
<dt v-if="conditions.temp != conditions.temp_min">Current Temperature</dt>
<dd v-if="conditions.temp != conditions.temp_min">{{ conditions.temp }}%</dd>
<dt>Humidity</dt>
<dd>{{ conditions.humidity }}%</dd>
<dt>High</dt>
<dd>{{ conditions.temp_max }}°F</dd>
<dt>Low</dt>
<dd>{{ conditions.temp_min }}°F</dd>
</dl>
</div>
</template>
<script>
export default {
name: 'WeatherConditions',
data () {
return {
}
},
props: {
conditions: {}
}
}
</script>
<style scoped>
dl {
padding: 5px;
background: #e8e8e8;
}
dt {
float: left;
clear: left;
width: 120px;
text-align: right;
font-weight: bold;
color: blue;
}
dd {
margin: 0 0 0 130px;
padding: 0 0 0.5em 0;
}
dt::after {
content: ":";
}
</style>
ErrorList.vue
<template>
  <div>
    <div v-if="errorList.length > 0">
      <h2>There was an error fetching data.</h2>
      <ul class="errors">
        <li v-for="error in errorList">{{ error }}</li>
      </ul>
    </div>
  </div>
</template>

<script>
export default {
  name: 'ErrorList',
  data () {
    return {

    }
  },
  props: {
    errorList: []
  }
}
</script>

<style scoped>
  .errors li {
    color: red;
    border: solid red 1px;
    padding: 5px;
  }
</style>
There are also a couple of small clean-up tasks that should be completed as part of the steps above, but those have been left out of this summary of file changes to keep this section shorter.
Base API Configuration
The contents of src/common/api.js:
import axios from 'axios';

export const API = axios.create({
  baseURL: `//api.openweathermap.org/data/2.5/`
})
API.interceptors.request.use(function (config) {
    // Set APPID on each request
    config.params.APPID = 'd9947bfbe4d5f42fa39c0d5e08ff915f';
    config.params.units = 'imperial';
    return config;
  }, function (error) {
    // Do something with request error
    return Promise.reject(error);
  });
Build and Deploy
Once we've finished our work, we can build and deploy the project. This project has been configured to build to the docs/ directory, so we can follow the same pattern we used before:
- Execute the
npm run buildcommand to build the files into thedocs/directory. - Commit all of our code.
- Push the code up to GitHub.
- Go into the repository settings and set the GH Pages section to publish from the
docs/directory.
The project should now be up and available to the public through GH Pages.
Stretch Goals
Stretch goals are provided to gain extra practice and a higher degree of challenge. If this work has been straightforward, then we are encouraged to keep pushing. There are several more opportunities to improve the organization and structure of this project, so feel free to keep honing it until it is as lean and mean as possible.
- Abstract the addition of the
° Fformatting on temperatures to a filter used in a common file. - Abstract the
formatDatefilter to a common file. - Create a child component to provide navigation between city search, current weather, and forecast views. Implement this component on each URL.
There may be other opportunities to improve this codebase that are not listed here. Feel free to explore and experiment with ways of rearranging the features in this application to get a better idea of what can be accomplished through refactoring.